Казахстан, Кокшетау

СДЕЛАЙТЕ СВОИ УРОКИ ЕЩЁ ЭФФЕКТИВНЕЕ, А ЖИЗНЬ СВОБОДНЕЕ
Благодаря готовым учебным материалам для работы в классе и дистанционно
Скидки до 50 % на комплекты
только до
Готовые ключевые этапы урока всегда будут у вас под рукой
Организационный момент
Проверка знаний
Объяснение материала
Закрепление изученного
Итоги урока
Была в сети 20.09.2019 15:01

Плюшко Ольга Степановна
учитель английского языка
 306
 145 337

Местоположение
Travelling. Identifying Directions
Категория:
Английский язык
20.09.2019 14:24

Просмотр содержимого документа
«Travelling. Identifying Directions»
LESSON PLAN
| Identifying Directions | Grade 9 | ||||
| Lesson objectives | All learners will be able to: Use subject vocabulary to understand the route Most learners will be able to: Create a route using subject vocabulary Some learners will be able to: Navigate a map easily when elaborating or identifying a route | ||||
| Value links | Respect, Cooperation | ||||
| Cross curricular links | Geography, Social Studies | ||||
| ICT skills | Use of online definition dictionary if necessary | ||||
| Previous learning | Students are aware of basic “Identifying direction” vocabulary | ||||
| Kazakh culture | Travelling in Kazakhstan | ||||
| Intercultural link | Travelling abroad | ||||
| Pastoral care | To create a friendly atmosphere for collaborative work | ||||
| Timings | Planned activities | Resources | |||
| 2 minutes (W)
| Welcome, Warm-Up Chat & Objectives Welcome students and ask them how they are doing. Go over the slide to introduce the lesson objectives: Enlarge subject-specific vocabulary to explain the route Navigate a map when creating or identifying a route |
Slide 1
| |||
|
10 minutes (I/P)
5 minutes (W)
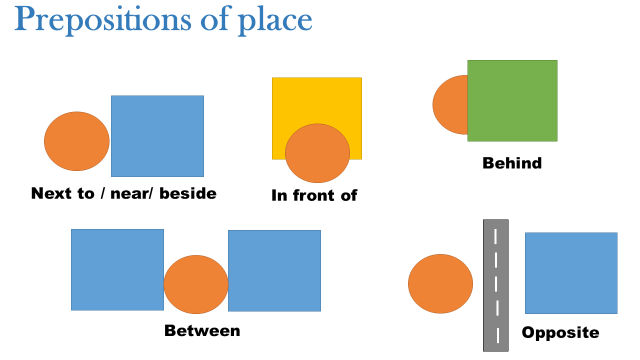
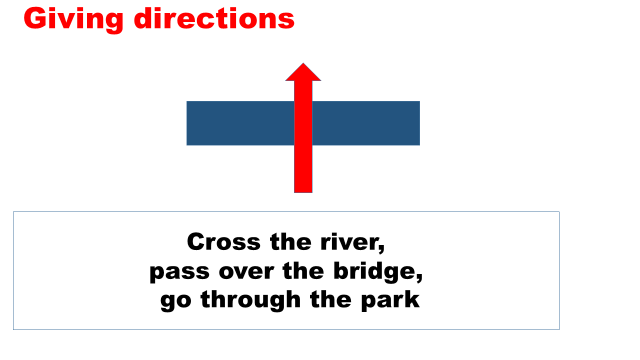
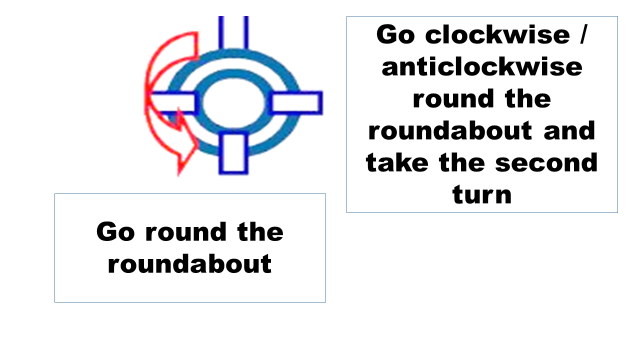
| Vocabulary consolidation Students work in pairs or individually. They are provided with vocabulary worksheets to identify the common prepositions of place and directing verb expressions. At this stage students write down what they are familiar with. Encourage students to guess or predict the words. This activity will help students to review useful vocabulary for map labeling and reveal the ones they need to learn.
Encourage students to compare their answers, especially the most confusing ones, with the classmates before flipping through Slides 3-10 for the right answers. Go through Slides 3-8 to check the answers.
|
Handout 1 (Vocabulary)
Slides 2-10
| |||
|
15 minutes (I/P)
8 minutes (I/P)
3 minutes (I/P) |
“Where to go” activity Part 1: Students work individually. Ten maps are hanging on the walls all around the class. They are numbered from 1 to 10. Students choose any map, determine a starting point (draw a star, for example), identify any place on the map and write a route to this specifically chosen by them destination. On the back side of a sticker next to the map they write the name of the place.
Part 2: Students are provided with an answer sheet. They choose a map to start with. They read the description of the route, try to guess the place of destination and write the name of the place onto the answer sheet next to the appropriate map number. Teacher sets the time (30 seconds/ 1 minute, it depends on the class) to make the activity more challenging and every time gives a signal (clap the hands) for students to move to the next map clockwise / anticlockwise. Make sure that students do not look at the back side of the sticker at this stage.
Part 3: When students identified the places on all the maps, ask them to do self-checking by comparing their answers with the ones written on the stickers.
**** It is better to use a pencil for this activity as a pen can stop writing on a vertical surface. Also encourage students to use the vocab. worksheet to utilize various verbs and expressions. **** Let students who need special support work in pairs. **** If a class works slowly there is no necessity for students to identify the destinations on all the maps. Make sure to leave a few minutes for the feedback and reflection. |
Handout 2 (Map)
Handout 3 (Answer sheets)
Stickers, pencils | |||
| 2 minutes (I/P/W) | Reflection Students reflect on the hardest or the most complicated or confusing routes at the end of the lesson and explain why. | Slide 11 | |||
Handout 1
Handout 2
INSTRUCTIONS:
1) Determine a starting point (draw a star).
2) Create a route to any destination.
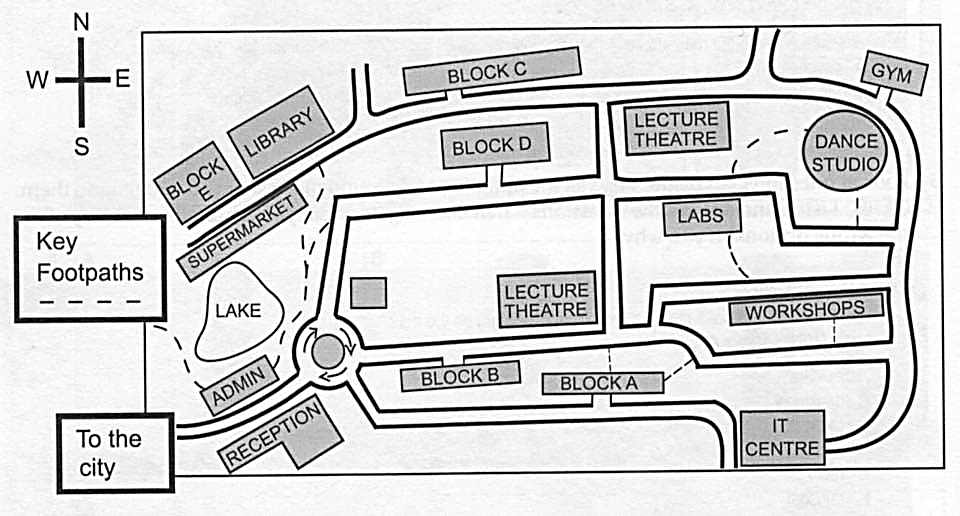 3) On the back side of a sticker next to the map write the name of the place.
_____________________________________________________________________________________________________________________________________________________________________________________________________________________________________________________________________________________________________________________________________________________________________________________________________________________________________________________________
Handout 3
Name _____________________
| Map number | Destination name | Self-checking |
| 1 |
|
|
| 2 |
|
|
| 3 |
|
|
| 4 |
|
|
| 5 |
|
|
| 6 |
|
|
| 7 |
|
|
| 8 |
|
|
| 9 |
|
|
| 10 |
|
|
Slides 2-10





Вебинар для учителей
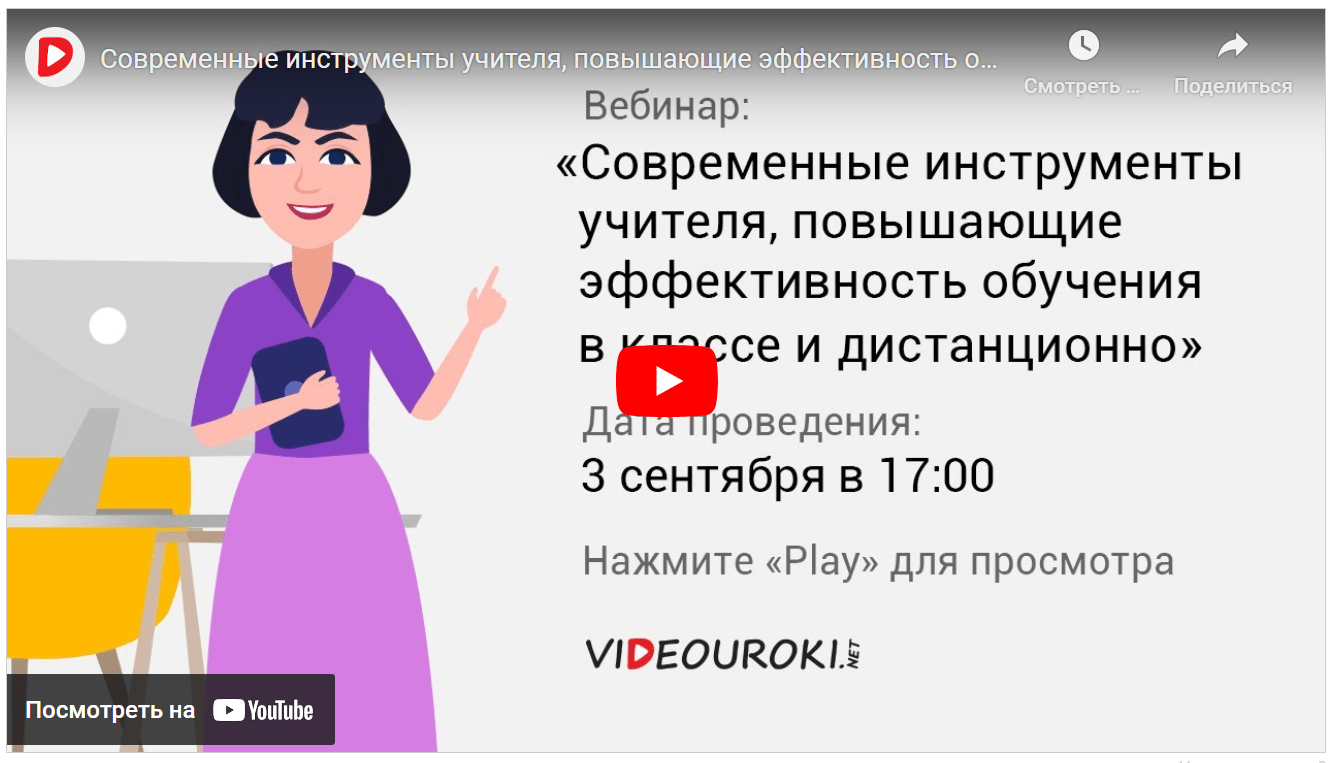
🎓 Свидетельство об участии ✨БЕСПЛАТНО!✨